How to Create a Stunning Statement Ceiling


Learn how to create a stunning statement with this tutorial for a rustic planked ceiling.
This post may contain affiliate links. Please see my full disclosure policy for more details.
Statement Ceilings are the New Accent Wall
Do you remember way back in the early 2000s when painted accent walls were all the rage? You know the look. Where 3 walls were painted one color and one wall, typically the focal wall, was painted a much bolder color to draw attention.
To me it feels like that overeager kid in class always raising their hand yelling “pick me! Pick me!” The accent wall is trying too hard and asking for way too much attention.
I’ll admit, I was guilty of following this trend in my first home. This was right about the time when tans, beiges and browns were the IT color of home improvement.

This was actually my old living room.
Accent walls aren’t totally gone, they’ve just evolved to include awesome molding and trim designs like the one in our sons rustic teen room makeover.
make way for the Statement Ceiling
How many times have you actually paid attention to your white ceiling when you’re painting a room? It’s literally a blank canvas and we typically just slap some flat white paint up there and call it a day. Because you only decorate the walls right?
Wrong.
You guys, the ceiling is prime real estate to tie in your décor theme.
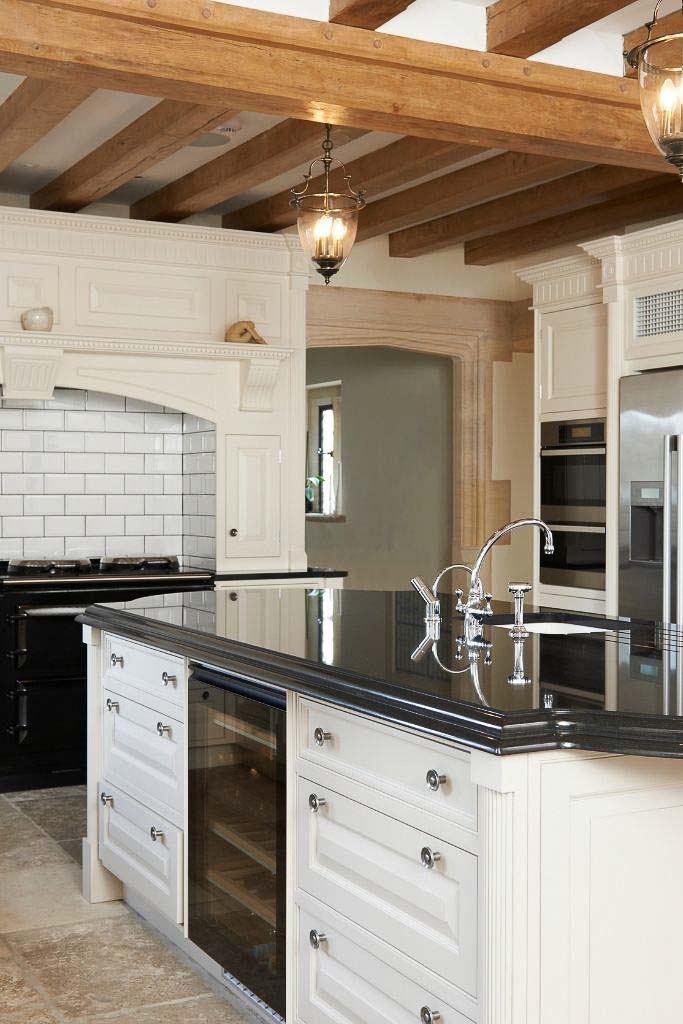
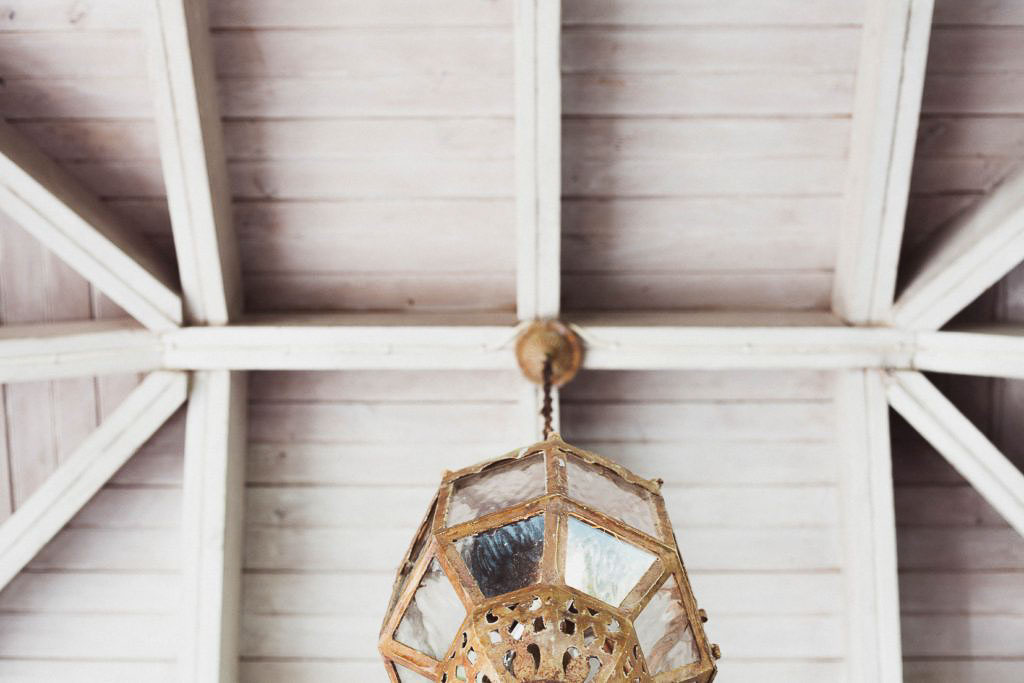
Just look at some of these gorgeous ceilings and tell me you don’t want to run right out to Home Depot, like now?!


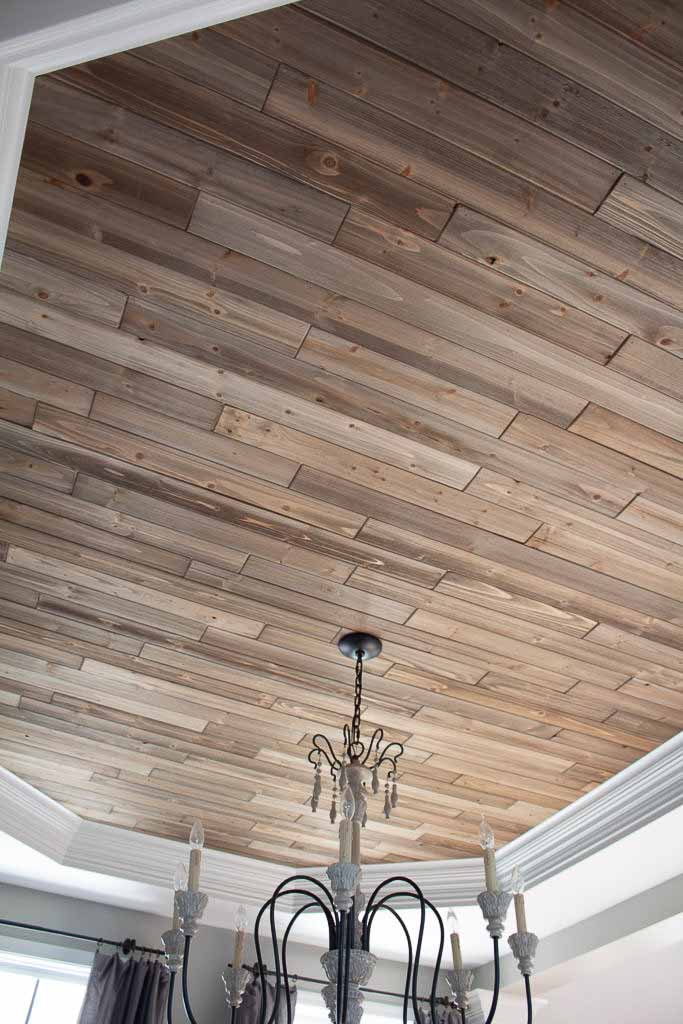
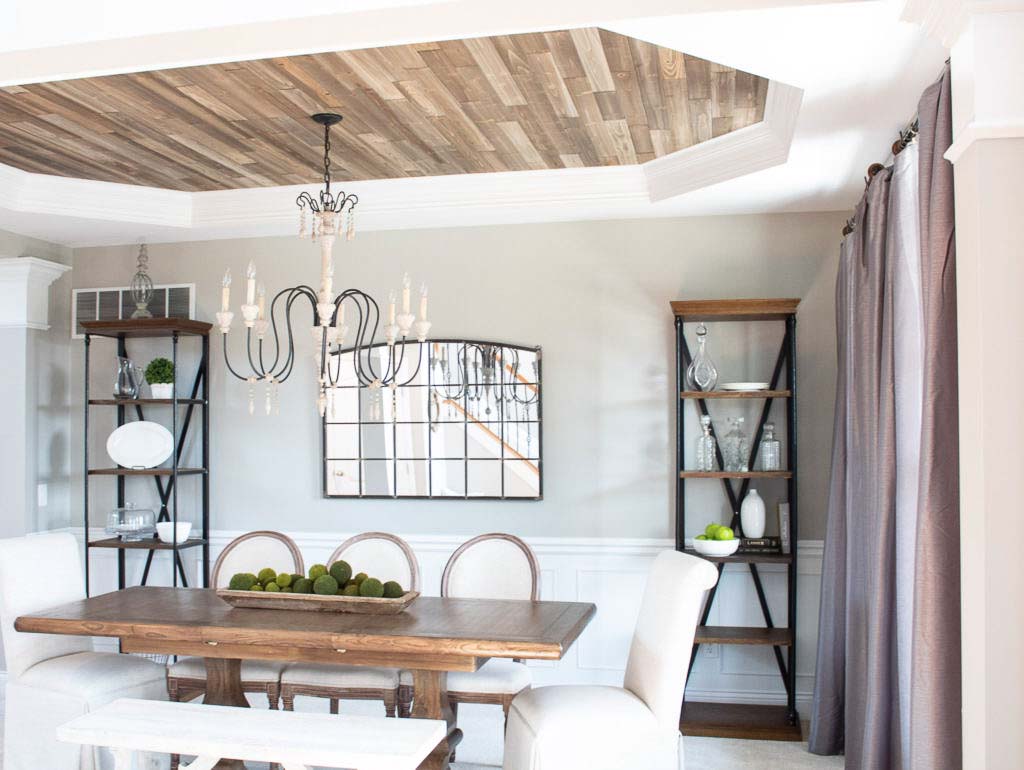
My Statement Ceiling
When we bought our home last year I immediately knew I wanted to incorporate some rustic wood elements into the living room ceilings. I’m patiently waiting for the right time to sweet talk my husband into installing some gorgeous faux wood beams in our great room here. [If you’re reading this honey, I’m sorry] 😉

But in the meantime, I settled for an area that wouldn’t require him to scale 20 feet of scaffolding where he’d have to fear falling and breaking a limb. Because I’m a good wife like that.
Our dining room came with an awesome tray ceiling topped off with some pretty intricate crown molding. It was practically screaming “Dress me up!”

I love tray ceilings because they feel like a small enclosed area where you can take a risk and get creative without overwhelming a room design.
The Plan for a rustic planked ceiling
I wrestled with so many different options for a rustic wood planked ceiling. I considered how easy it might be to throw some peel and stick wallpaper up there and call it a day. Then I saw some large 8 foot faux wood panels and thought that could get the job done with minimal cuts.
Neither option would have given me the real wood look I was going for though. This project was going to require actual wood planks if I wanted it to appear timeless.
In the end, I chose these weathered wood tongue and groove planks from Lowes.

For the price, we couldn’t beat it, and the installation was incredibly easy. At least from my perspective (I was supervising).
Tools needed for the project
*I’ve linked a few options you can purchase below
- Measuring Tape
- Brad nailer
- Wood Planks
- Miter saw

Steps to create the statement ceiling
Again, I was only supervising (and wrangling toddlers), but I promise this project is super easy with your basic handy skills.
First, measure it out
Measure the area of your ceiling that you would like to cover. Be sure to add an additional 10% onto your measurements to account for wood that gets wasted during the cutting process.
Next, choose your wood
With all the different options and styles of wood on the market, I encourage you to look for something that’s high quality. You can’t go wrong with real materials over faux. But if you do choose faux wood just make sure that you can cut and install it just as easily as the real thing.
I highly suggest using tongue and groove planks for this project as it makes the installation so much easier when you don’t have to worry about spacing out your boards.
Bonus, when placing our planks on the ceiling, they practically held themselves in place for us to nail them. Hey, I am all about efficiency.
Now mix it up
Planked boards in packages like the ones I purchased are manufactured similar to hardwood flooring. Meaning they’re made and packaged in lots, so one box is usually all from the same color lot.
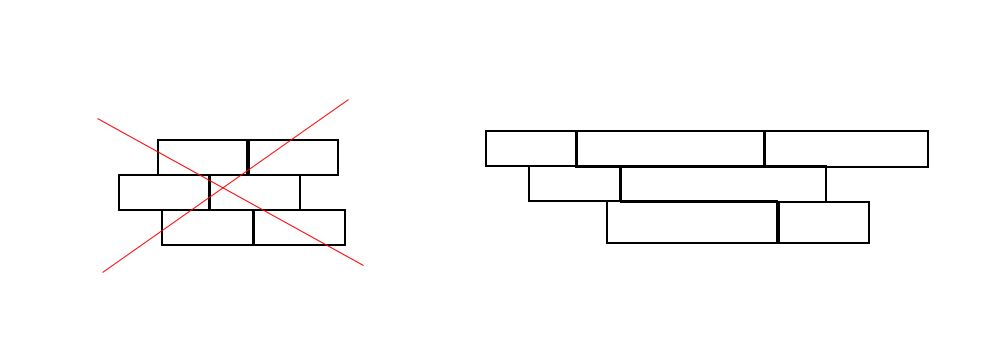
You’ll want to take a few boards out of each package to mix them up with various colors and sizes as you’re planning you’re layout for install.
The last thing you want is to have patches of wood on your ceiling that look uniform and identical. Take a look at this example on the wrong and right way to install wood planks for variation.
Then, make your cuts
The great thing about the boards I used is that they already come in varying lengths, but you’ll still need to break out the miter saw for additional cuts.
I’m a huge fan of the miter saw for DIY projects. It may seem pretty intimidating at first, but it’s actually one of the easiest power tools to use in my opinion.
Youtube tutorials can be a DIYers best friend when it comes to getting comfortable with power tools. So take some time to learn some valuable tips on how to use the most basic tools.
Anika, over at Anika’s DIY life has a great tutorial here on everything a beginner needs to know about miter saws. It’s a really great resource to check out if you’re timid about using power tools.
It’s incredibly empowering to complete an awesome project and know that you accomplished it yourself.
Lastly, install your planked ceiling!
Using a brad nailer, start attaching your first board. I swear this tool is just as fun as a staple gun. Once you get going, you just can’t stop!

Install each board side by side keeping the seams as close together as you possibly can. The first row is the hardest, but once you get it installed the rest is a breeze.
Continue each row by inserting the tongue and groove boards together to secure them in place before nailing.
Voila! Stand back and admire your gorgeous planked ceiling!
This project was one of the first ones we attempted in our new home and it’s still one of my favorites. It’s a huge transformation at a pretty low cost, which was right up my alley.
We ultimately all want to love our homes, and sometimes the smallest updates are those that can make the biggest difference.
Update!
I recently painted over this gorgeous ceiling to give it a modern moody vibe for our dining room makeover. You can read all about that decision and the full reveal here!
pin this rustic planked ceiling for later
I hope this post inspired you to take on a project that can help you love the home you have. If you enjoyed it, please share this on social media so that I can help others create a beautiful space!
P.S.
Make sure to sign up for my weekly newsletter below where I stay in touch to help you with your home and share some of my best design tips and advice you won’t find anywhere on the blog. This is my exclusive little community and I’d love for you to be a part of it!


This is fabulous! Did you have to remove the crown molding first??
Thank you! We actually left the crown up
Great looking ceiling. I’m thinking of doing the same thing in our Florida home Lanai Ceiling. I think the material would need to be more of a plastic type of plank due to mold? Any thoughts?
Bill
Thank you Bill! I would think you might want to use a pressure treated type wood for that project, or a pvc material.
Thanks for sharing this! I love the crown molding in your dining area, and I love what you were able to do with the planks. We can’t wait to get it done in our home. Once we’re done, we’re going to get our hardwood floor resurfaced to try to match it up a bit. Thanks again.
Thanks so much Alicia! Glad you enjoyed it!
Your ceilings are beautiful. This is such a smart idea! I would love to do this in our kitchen. We are doing some kitchen cabinet refinishing here in Salisbury next week. This would be the best finishing touch for our kitchen.
Thanks so much Jackie!
Beautiful ceiling. Then I saw your update. So you went through all of the trouble, time and expense to put up the wood and then painted it black. It would have been easier and cheaper to just paint the ceiling.
Hi Clayton! I painted the ceiling about 3 years later, my style just evolved. But I do love the texture the rustic wood planks give it with the black paint, it almost looks stained. Thanks for reading!
This is sooo awesome! Did you put any sort of protective finish on them? Do you think this would be okay in a bathroom?
Thanks Anna! Nope they were pre-finished planks, but I’m not sure about how it would hold up in a bathroom with moisture. I’m guessing it would depend on how good the ventilation is. Sorry if that wasn’t much help
This is so beautiful! Did you need to caulk or fill nail holes on the planks?
Thanks Jennifer! Most of the nail hoes were in the tongue and grooves but there were some in the planks. They’re so small you can barely see them so we didn’t fill.
Hi, love this! How it you do it around the fan?
Sorry, how did you do it around the fan?
Thank you! We unscrewed the lighting cap cut the planks in a circle around it and screwed the lighting cap back on.
Hi! Did you use the link for your ceilings exactly? I bought the weathered gray planks from your link & they look more grey than yours??
Hi Sarah, I did use those exact boards from the post. Some of mine were more gray and some had an orange tint from the pine to it. I think it just depends on the batch honestly. Which is why I recommend opening all packages and mixing all the boards together. Also, I just double checked the spare package in my garage and they look more gray, but when on my ceiling they appear more brown. I hope that helps! They do make a cedar color as well.
So helpful! Thanks so much!
good luck! I’d love to see your project when you’re finished! Shoot me an e-mail 🙂
This is a beautiful way to completely change the look of your dinning room. I love how it turned out! What a fun way to tie in your design elements in a unique way. So beautiful!
Thanks so much Erin! We still get so many compliment on this ceiling from visitors. It really is an interesting design element.
This is so beautiful. I’m going to pin it for later!
Thank you so much Tanya! It’s such a neat statement when you first walk in our home.