Our DIY Bathroom Remodel on a Budget
Find out how to remodel any bathroom on a budget with these inexpensive and DIY friendly updates.

This post contains affiliate links. Please see my full disclosure policy for more details.
1. work with what you have
The most important part of any bathroom remodel is setting a budget for the work and materials. But when you’re working on a shoestring budget to get the bathroom of your dreams, this step isn’t just important, it’s crucial.
If you already know that you won’t be able to afford gutting an entire bathroom, then you need to get absolutely scrappy about what stays and what goes.
Taking stock of what’s in good condition in your bathroom is a great place to begin. You’ll be able to make the necessary decisions of what existing things you can work around, and what are total design deal breakers.

This is what our bathroom looked like when we first moved in two years ago. Not terrible, in fact it had a great layout with plenty of space. I just wasn’t into the builder grade look and wanted to make it more our own style.
We decided the most cost effective approach to remodeling this space was to keep as much of the existing material as we could. So the flooring, vanity, and tub and shower tile all stayed.
The rest of the work would really be just cosmetic and we knew we could save a lot of money doing the upgrades on our own.
So how can you achieve a DIY bathroom remodel on a budget, and what did we end up doing in this space?
2. Paint a new color palette
cost: $200
Hands down, the most budget friendly DIY you can make to any bathroom is a fresh coat of paint to the walls, trim and doors. And since bathrooms can get pretty disgusting over time, it’s worth the effort to repaint all of the surfaces and remove any grime.

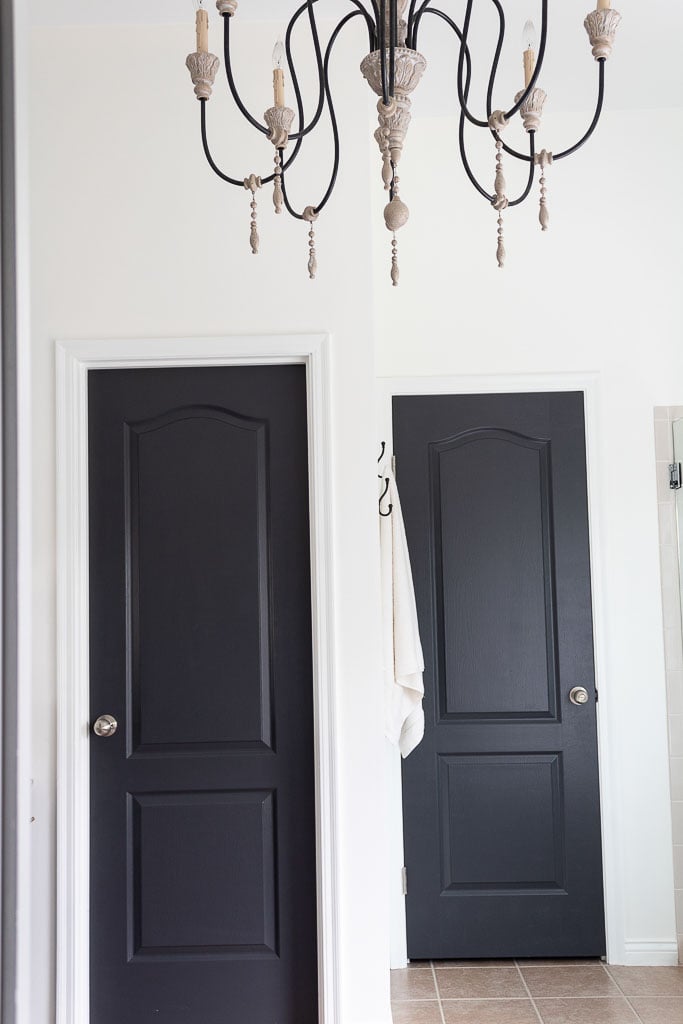
I wanted to go for a crisp clean look in our bathroom since I was left to work around the dark beige tile. Loving how much our white powder room turned out, I decided to take the plunge and paint the walls and trim using Benjamin Moore’s “Simply White”.
But the amazing pop of contrast is in these black painted doors using another favorite Benjamin Moore color, “Cheating Heart”.
3. repair vs. replace
COST: $25
You’ll save a lot of money on your bathroom remodel by choosing to make repairs to items, rather than completely replace them. So look for any options to make minor repairs to your bathroom such as: re-caulking showers and tub surrounds, re-glazing bathtubs, fixing running toilets and more.
Most of these repairs are DIY friendly and you’ll be surprised with how much better your bathroom looks and feels with just a few DIY fixes.

Aside from re-caulking practically every square inch of our shower and tub, we chose to fix some small areas of cracked grout in our floor. It was an eyesore that drove us crazy for two years and only took about 20 minutes to repair.
4. refresh your grout
COST: $17
Painting tile grout is one my favorite budget friendly ways to update any old bathroom. It’s incredibly easy and makes outdated tile floors look brand new in as little as a day.


I love how much brighter our boring beige tiles looked after this project. And at only $17 a bottle, it was well worth the investment to try out a few different colors to find the perfect one.
5. mix old and new items for a fresh look
COST: $100
There’s a secret designers have to making any DIY remodeling project look professional. And that’s to balance out keeping old existing items and materials with adding in fresh new fixtures and upgrades.

By adding in new laminate countertops to our painted vanity we were able to get the look of granite for a fraction of the cost. You can read all about why this faux material is a great budget-friendly option for bathroom remodels and how we scored a new countertop for only $100.
And unless you’re super up-close and touching the countertop, you can’t even tell it’s not real granite.

6. remove and replace builder grade items
COST: $490
If certain builder grade items can’t be updated in your bathroom remodel, then replacing them is an absolute must. Typically, this goes for most lighting fixtures and faucets. Which happen to be some of the least inexpensive items to replace in a bathroom as long as you know where and how to shop sales.
Our vanity lighting was super stylish and pretty inexpensive, but I have a lot of other options for budget vanity lighting that I couldn’t believe were all under $100.

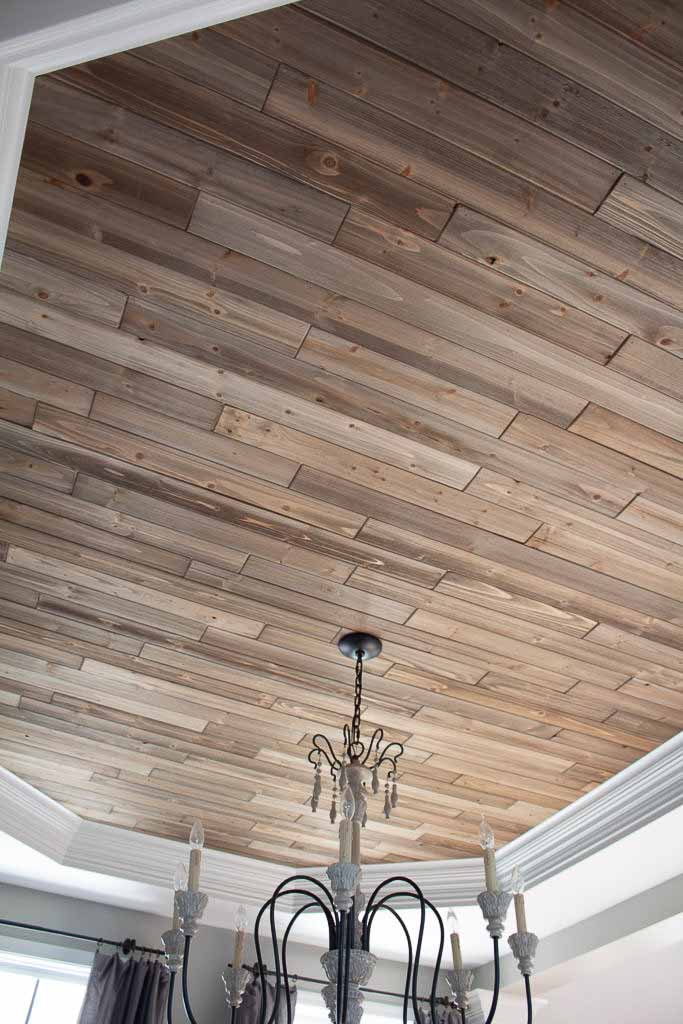
Yes, that is in fact a giant chandelier in the middle of our bathroom, and I love it. I actually swapped it out of our dining room because the neutral colors went perfectly with everything else in this space. And it added a little touch of unexpected drama. Far from builder grade right?
7. add aditional storage
COST: $130
You can customize any builder grade vanity by making some inexpensive DIY updates like adding decorative lattice trim or even additional built-in storage.

We added this bathroom countertop cabinet, and you would think it was meant to be there the entire time.


We also added a simple painted strip of quarter round molding to the base of the vanity cabinet because the existing toe kick was warped and uneven. Another inexpensive DIY repair that helped this vanity look more polished.
8. replace knobs and hardware
COST: $60
When it comes to shopping for new hardware for your bathroom, avoid the big box stores and head straight over to Amazon for some real cost savings. I was able to purchase the same exact champagne gold hardware for our vanity at half the price of the hardware store. And I even have a ton left over for a future project as it came in a bulk order.


Adding in some coordinating decorative hardware like new robe hooks or towel racks are another great inexpensive way to update the look of any bathroom.

9. add a backsplash
COST: $200
Adding a backsplash was more out of necessity for our bathroom than looks. Since we fabricated our own countertop we needed to cover the gap where it met the walls to avoid any water damage. But it’s also a great decorative way to protect your bathroom walls for very little cost.

This neutral arabesque tile also helped to tie into the beige and cream colors in the flooring and countertop and gave the space a more custom look on a DIY budget.
10. shop wholesale
COST: $50
One of my favorite budget design tips is to seek out and shop wholesale stores online or in your community. Generally these little “shops” are reselling returned items from the big box stores. And they do this a fraction of the price you’d pay for retail.
A great place to find these deals is in your local Facebook community or by doing general searches in the Facebook marketplace app.

Would you believe my shock when I scored this set of matching mirrors for $50 and quickly googled to find out they were retailing for over $300 a piece?! In no world would I have been able to afford that for our budget bathroom makeover.
And it was actually this pair of mirrors that started the entire bathroom design concept in the first place. Hey, never pass up a great deal right?!
11. install shades on your windows
COST: $30
If you’re fortunate enough to have natural lighting from windows in your bathroom, then take advantage of this area to tie into the rest of your bathroom design. I created this budget friendly window cornice out of a spare curtain panel and some decorative ribbon I ordered online from Etsy.

Don’t worry, we still have privacy, but the boring cordless shade is tucked behind the pretty new window cornice.
12. create a new color palette with a rug
COST: $25
If you can’t afford to replace your outdated bathroom flooring, and you’re still not in love with it after freshening up the grout, then work to camouflaged it with an inexpensive decorative rug.

I picked up this beautiful vintage looking rug at TJ Maxx and it ties into the neutral and dark paint colors to really bring the entire room full circle.

So ditch the standard fuzzy bathroom rugs and opt for an oversized statement rug instead.
13. shop your home for decor and accessories
COST: $0
If you’ve been following the blog for a while then you’ll know that my favorite budget decorating tips is to shop my own home before I head to any stores. It’s a great way to bring old decorative items out of storage and repurpose them in new and different ways.

Like my apothecary jar that now doubles as decorative storage for some relaxing bath salts.

So what was the total cost of our DIY budget bathroom remodel?
$1,327
I’m pretty impressed with the drastic change of our master bathroom. And with very little demo work involved.


I appreciate you sharing this blog post. Thanks Again. Cool.
Great information shared.. really enjoyed reading this post thank you author for sharing this post .. appreciated
How hard was it to take down your original light fixtures and the mirror on the wall ? We have almost the exact same thing.
Hi Kaye! Lights are fairly easy to replace and the mirror was clipped in so other than the weight it was pretty simple. I have seen a lot of builder grade mirrors glued on though and it’s a huge pain to remove and repair drywall after.
We’re planning to renovate our bathroom. I got an idea of how to do it on a budget. Thanks, Martina
Awesome! Have fun with your renovation!
You are truly a woman after my own heart with the blue and white! I have been in love with this color combination for a long time, you out did yourselfon this bathroom, it is absolutely gorgeous
Aww thank you so much Whitley!!!
Hi! I’m trying to find where you explain the process for painting the cabinets. Can you help me with a link?
Hi Jen! Sure thing! It should be linked in the blog post so I’ll definitely check that out, so sorry! Here it is, but it’s more of a what not to do type post. https://thelivedinlook.com/cabinet-painting-mistakes/
Your style is so unique in comparison to other people I have read stuff from. Marlyn Marlin Alage
Im grateful for the blog post. Really thank you! Fantastic. Donnie Iago Fusco
This is one awesome blog post. Thanks Again. Want more. Aile Liam Richara
Thanks to my father who shared with me regarding this website, this weblog is truly amazing. Anitra Case Thirzia