Our Swing Set Makeover: How to Make Old Look New Again

Be inspired to makeover your tired, worn swing set into an amazing custom toy your kids will love for years to come.
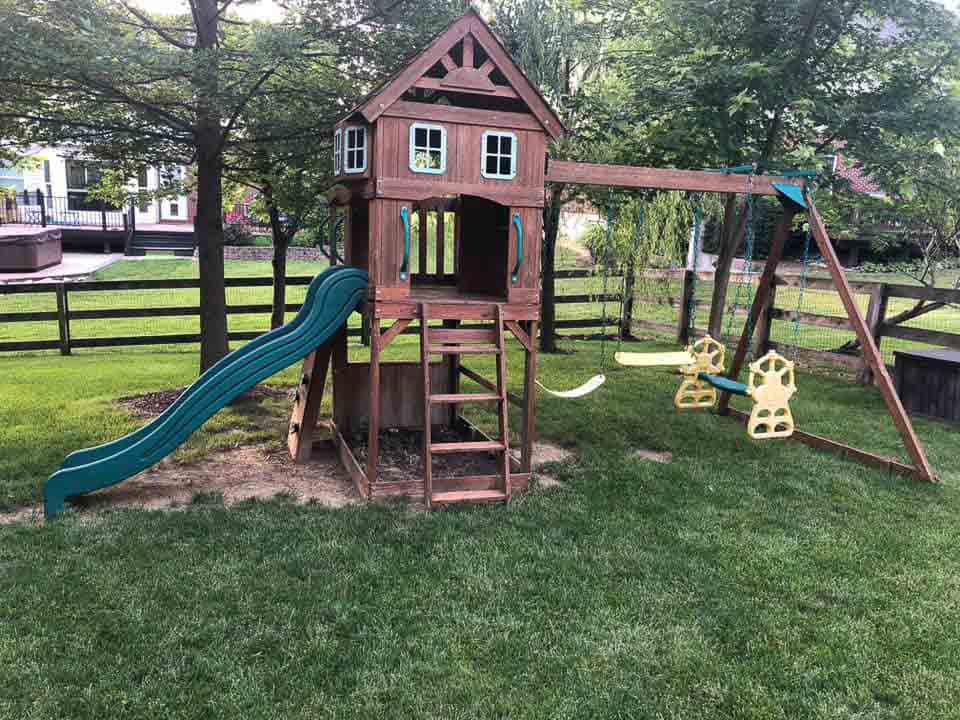
If you have kids, there’s a good chance you or someone you know has one of those giant wooden play structures with all of the bells and whistles in your backyard. They provide hours of endless entertainment and imagination for the neighborhood kids, and plenty of nights are spent swinging their little hearts out. Those were my memories growing up for sure.
This post may contain affiliate links. Please see my full disclosure policy for more details.
What happens though after years of play, love, and sunshine have taken their tolls and these giant toys? They become faded and worn. Sometimes with squeaking boards and dry, rotting wood that can actually become quite unsafe if you’re not maintaining them.
So before you decide to chop it up for spare wood or parts, consider trying to breathe some life into that old swing set to make it feel new again.
Just like I had some amazing memories on my swing set growing up, I wanted to give my children the same magical experience in their own backyard. For months my son had been begging us for a swing set, but we just couldn’t bring ourselves to spend thousands of dollars on one when we weren’t quite sure what the plan was for our largely unusable backyard.
how to restore a wooden swing set
As fate would have it, I came across an old swing set that my sweet neighbor was giving away after her own children outgrew it. For those that know me well, they will tell you that I have absolutely zero self-control for turning down items that I can clean up or repurpose.
I tend to always see the potential in old things and love the process of creating something new. Plus I know a good bargain when I see one, and aint no better bargain than free my friends.
I wasn’t one-bit surprised when my hubby quickly agreed to pick up the old swing set and haul it home after work. This man will do anything to see a smile on his kids’ faces. And boy did they light up when I picked them up at daycare to tell them about their big surprise.
Free Parenting Win my friends! Well….almost free…
Budget Swing Set Makeover
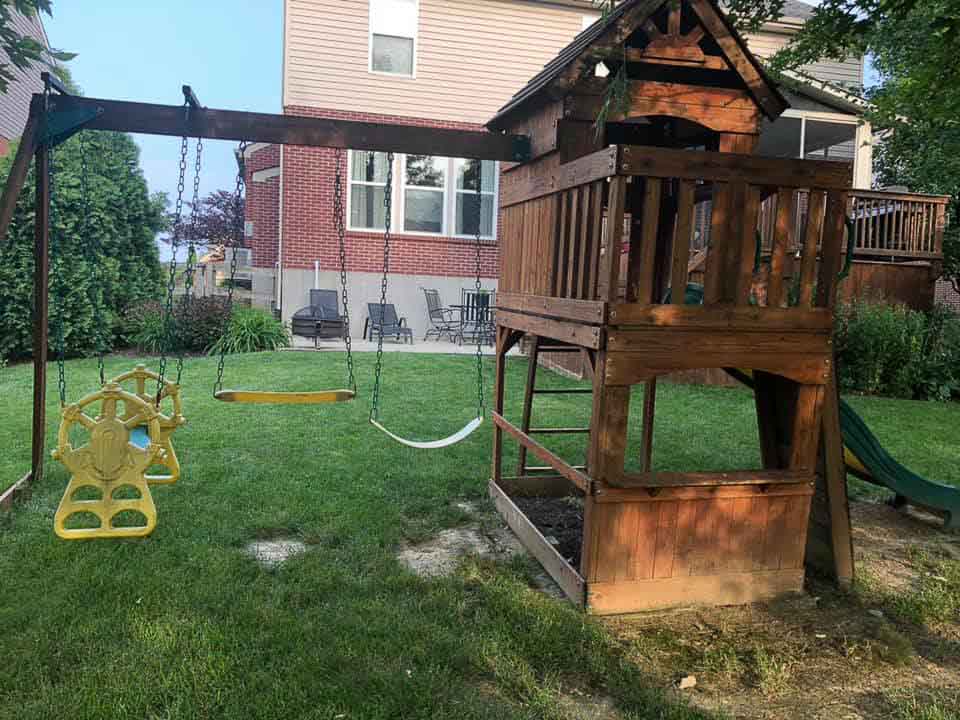
It turns out this awesome free gift was in need of some major repairs to make it stable and safe for the kids to play on. But it definitely wasn’t a lost cause. It also had a lot of cosmetic wear that could easily be spruced up with some new accessories and spray paint.
Challenge accepted.
I immediately dove into Pinterest for inspiration on how others had made over their own wooden swing sets to completely transform them.
A Fixer-Upper Inspired Swing Set
Most of the typical wooden swing sets have the same basic red or grey stain on them to protect the wood from the elements. I didn’t want this swing set to be typical though, I wanted it to stand out, have some flair and fit our own unique style.
I came across a lot of really unique ideas from painted swing sets to full-on mini farmhouse-inspired playsets. I chose to go the route of a painted look to make the colors pop and have it feel more like a real playhouse attached to the swing set.
The Plan
I’m not gonna lie, this swing set was a beast to tackle, and my wonderful husband and dad did a lot of the hard labor on this project. I’d like to think I played the role of project manager/ designer while wrangling kids in and out of a kiddie pool every 5 minutes.
Here’s how you can break it down into some pretty manageable tasks and a couple of spare weekends of your own.
Cleaning it up
The very first thing you can do is to give an old swing set a good power washing. You wouldn’t believe how much dirt, debris and buildup these things can collect over the years. Cleaning it up first will help you better assess what areas might need repaired, reinforced, or even completely replaced.
Plus if you’re at all like me, power washing can be quite therapeutic. I love watching the clean lines strip off all the dirt and brighten back up. I’m weird I know.
repairing an old wooden swing set
In the end, a lot of the wood was so dry that the screws were no longer holding many of the boards in place. The bottom half of the ladder was cut off and we knew we were going to need to entirely rebuild it.
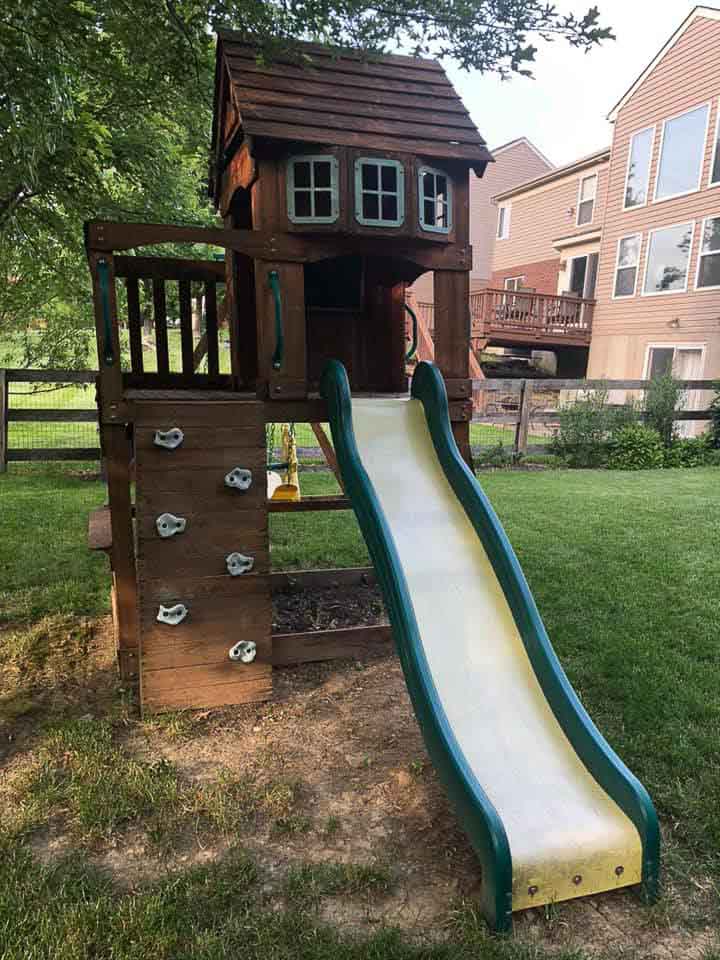
We winded up needing to replace the entire rock climbing wall, ladder, half of the floorboards for the upper playhouse, the entire base of the playhouse, the sideboards that wrapped around the lower portion of the playhouse, and a long baseboard to connect the main swing set brackets.
We also added extra paneling completely around the bottom of the playhouse to stabilize it and close it off to create a separate lower playhouse on the ground level.
While we can joke about it now, at the time we almost might have been better off building a new swing set from scratch. Hey, I never claim my ideas are perfect, but I’m always willing to give a new project a try. I definitely owe my husband for his help on this one though. He was so creative that he even managed to build the new rock climbing wall completely from scrap plywood we found underneath our deck.
painting a wooden swing set
After a full weekend of construction, we were back at it the following weekend to finish up this makeover. I opted for a painted stain look to provide the swing set with some color, but also to penetrate the wood and protect it from the harsh weather.


If you’re lucky enough to own a paint sprayer I highly recommend getting it out of storage for this project. Had ours not been broken we could’ve saved hours and avoided hand painting every wood plank.
We chose the colors light lead for the overall body of the swing set and the darker color pewter for the roof and a few of the structural pieces as an accent. Looking back, I wish I would’ve gone just a little bit darker than the pewter color, but it still turned out great.
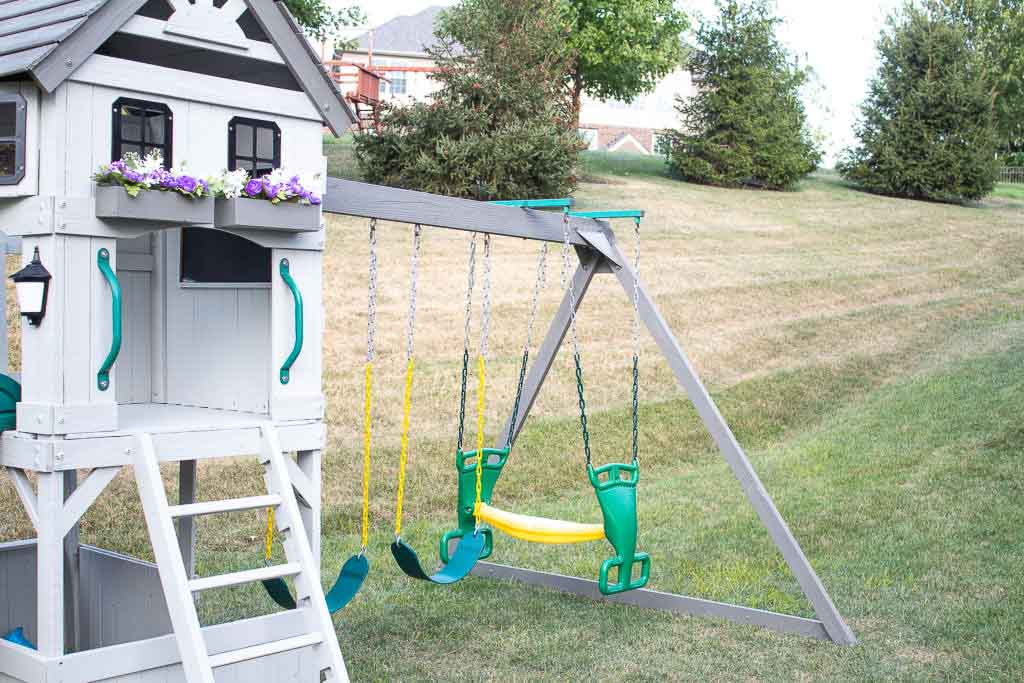


The paint alone made a huge difference, but, to be honest, I was really concerned that the light grey surface would show a lot of dirt and footprints from the kids playing on it, but so far it’s held up great. I also wanted to spray paint the faded window grids a solid matte black to stand out against the light grey paint on the play structure. I think it looks classic and pops against the light grey.

Finishing Touches for the Swing set makeover
Since all of the chains on the swing set were rusty I decided to replace them with a new set of swings as well as a glider. Everything was pretty faded from the sun so a set of fresh bright swings made it feel brand new again. Plus, I wanted to make sure the chains were coated in vinyl to avoid pinching my little ones’ fingers.
The climbing grips on the rock wall were completely faded, and since we were building a new climbing wall, I went ahead and ordered a new set of them as well. The slide itself was pretty smooth and in great condition other than some fading so I decided to save myself some money here and stick with the original one.


My favorite additions to this new swing set though are this adorable solar light and handmade window box for flowers. I really wanted the swing set to feel like a little playhouse so I found the perfect solar lantern sconce to put just outside one of the entryways. It’s motion censored too, so it comes on bright when activated, but also has a neat flicker flame effect in the evening.


I rounded up some of the spare wood planks and plywood leftover from the project to build 2 small window boxes for flowers. My 2 year old daughter is obsessed with flowers (and the color purple) so she’ll likely pull off every single petal, but doesn’t it look adorable?!
What we used for the project
- Behr Solid Color Stain $60
- New Wood $100
- New Swings $37
- Replacement Glider $102
- Climbing Grips for Rock wall $20
- Solar Light $20
- Floral Foam $3
- Faux Flowers $12
Total Cost of our Swing Set Makeover $358
All in all this was a pretty inexpensive project, but definitely a major investment of time. I’m super proud that we accomplished this swing set makeover for our kiddos and I know that they’ll enjoy it for many years to come.
pin this project for later
What do you think….would you makeover an old swing set to bring it back to life? Drop me a comment below to let me know what you think! I love hearing your ideas, questions and inspiration.
If you enjoyed this post you’ll love our playroom makeover
Thank you so much for taking the time out of your busy day to read this post. I truly hope it inspires you to take on some fun projects that will help you Love the Home you have.


Can you provide a link to the solar light you used? I clicked above but it’s not the same light.
Hi Lori! I just checked that link and it looks like Amazon changed the product, so sorry! Here’s a similar version in a 2 pack
Hi there!
I love the way your playset turned out! We are planning to use the same Behr stain in either white or light gray. How is it holding up after a few years? Have you had to pressure wash or re-paint since?
Also, after pressure washing and before painting/aiming did you have to sand?
Thank you!
Hi Jennifer! It’s held up amazing actually. No sanding, just pressure washing 🙂
Amazing! We are currently rehabbing the exact same playhouse that we got from our neighbors and I was wondering what type of paneling you used for the bottom?? Looks like beadboard but I didn’t think that would work outside in the elements. Thanks!!
Hey Sam! We actually used plain old 1x4s to frame out the bottom and create that little walled in play area
How has it held up? Are you happy with the Behr stain still? I’m thinking about using the same product on mine.
2 years in and it’s held up great! I was actually going to do another post on its performance.
Love the swing set. Can you provide a link and colors for the exact product used for this transformation.
We would love to do this to our set.
Thank you!
Hi Vasnessa, glad you enjoyed how it turned out! The stain we used is linked in the supplies section and the colors were listed in the post, but we chose light lead and pewter. I hope this helps! Happy DIYing!
What an upgraded look, and probably the envy of the neighborhood kids!
Thanks Pamela! And I think you;re right lol 😉
Hello Martina,
I so love these colors. I was just telling my daughter I wanted to paint her (ITS EVEN THE EXACT SAME PLAYGROUND MODEL) grey. Then I came across yours in Pinterest.
Question on the colors: a link takes me to a stain but your colors details stated -light lead & pewter.
Are those colors obtainable at Lowes Home depot or Walmart? I don’t think the Beahr stain will do. I would like paint.
Love your site. Looking forward to your answer.
Be safe,
George
Hi George! I believe those colors are specific to the Behr products I used. But, just so you know, it’s not technically a stain. It’s more of a hybrid paint/stain product and goes on more like a paint. I think you’ll be happy with how it goes on. It penetrates like a stain, but covers like a paint. I hope that’s helpful to you. Happy DIY adventures!