Faux Cement Lamp – An Easy DIY Upgrade
Learn how to create a faux cement lamp effect to completely transform a thrift store find into a high-end look on a budget.

This post contains affiliate links. Please see my full disclosure policy for more details.
I’ve been hanging onto this old thrifted lamp for a year now, a year! Just waiting for the perfect opportunity to use it somewhere in the house. Hey, when you fall in love with an old item you know you can transform, you better scoop it up before it’s gone!

The sad part is that this lamp was actually part of a set, but one was broken accidentally. I still think it makes a statement all on it’s own though. Be sure to check it out in the full dining room reveal here, along with some more budget friendly DIYs.

Is there a paint that looks like concrete?
Honestly, I’ve yet to find an all in one paint product that truly resembles the look of concrete, but I’m still searching. The closest I’ve come is this Rustoleum Specialty Cement Spray Paint.
It still lacks a lot of the texture and variation you’d want for a more realistic look, which is why I opted for my paint layering technique below.
How do you paint a lamp to look like concrete?
I absolutely love how quick and easy this concrete lamp project is. Realistically, you could complete it in a day, but because I made the mistake of leaving this beauty out to dry in a hot humid garage, mine took just a tad longer than I expected.
Below are the supplies you’ll want to gather in order to create your own concrete look table lamp. You’ll notice I marked a few as optional, simply because you may not want or need to use them.
Concrete Lamp DIY Supplies
- Any old lamp base
- Spray Primer
- Textured Stone Spray Paint
- Faux cement spray paint
- Flat Black Spray Paint
- Clear Matte Spray Sealer
- Krud Kutter / pre-paint prep cleaner
- Spackle & putty knife (optional)
- Modern cone shade (optional)

Step 1: Clean and prep your lamp base
I use Krud Kutter for almost all of my paint prep projects. It’s an amazing degreaser and ensures that your paint will adhere to the surface.
Simply spray down your surface and wipe it off with a clean dry, lint-free cloth or paper towel. This lamp had so many crevices and cracks, I was amazed at how dirty it had gotten just sitting around the past few months.

You’ll also want to protect your lamp’s electrical components from the spray paint. So it’s a good idea to cover the bulb base and cord with painter’s tape or a plastic protective bag.
Step 2: Prime your lamp base
Next, you’ll want to prime the surface of your lamp base with a good matte primer like this zinsser bullseye spray primer. It’s fast drying, and is crucial to prevent paint from chipping or peeling, even if you do you use an all in one spray paint and primer for the next step.

You may need a few passes to entirely coat the surface of your lamp. I recommend spraying continuously from side to side to avoid paint drips and runs that can happen from starting and stopping frequently.

Step 3: Apply spackling (optional)
This is a completely optional step, but was necessary for my lamp base because I wanted to cover the basket weave pattern and some of the deep crevices and grooves in the surface.

I applied the spackling with a plastic putty knife in horizontal strokes. By using thin layers I was able to get a smoother application without it looking too heavy or bulky on the lamp base.

After it dried, I lightly sanded it with a sanding block to remove any rough edges in the finish.
Step 4: Apply textured spray paint
I really wanted this lamp to have a true concrete effect. That meant using a textured paint or material to get that gritty even, but rough surface look.
You can use any textured stone look spray paint, but I opted for this Krylon textured sandstone color because I was going to be needing a lighter color to layer in with some of the darker tones.
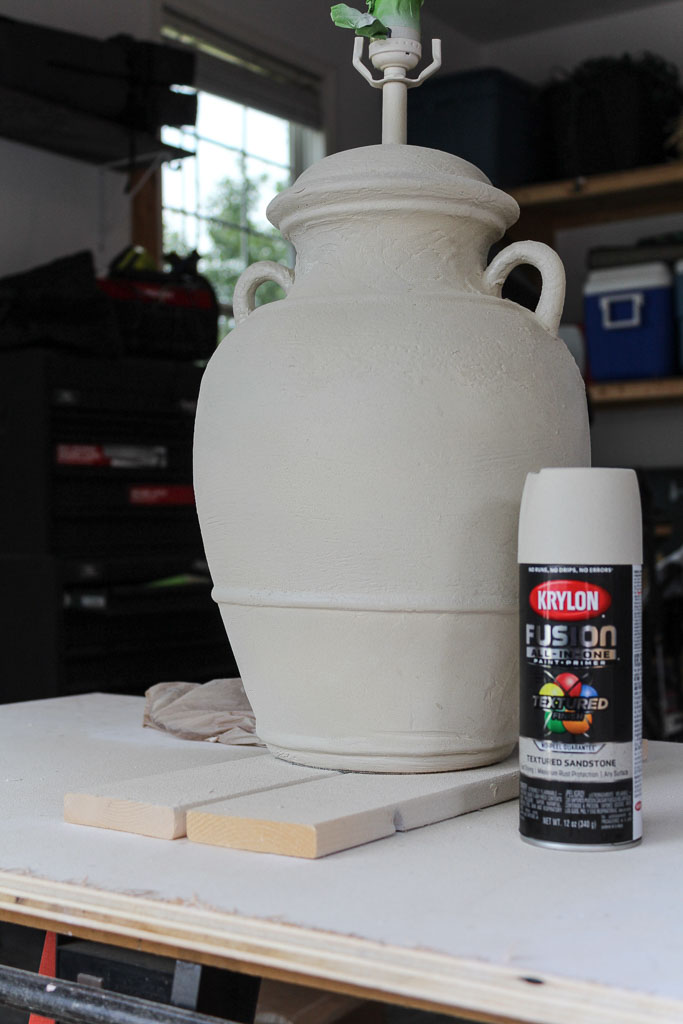
I coated the entire lamp in about two passes just like I did the spray primer. I was pretty impressed with the texture and how well it stayed put without flaking or sanding off.
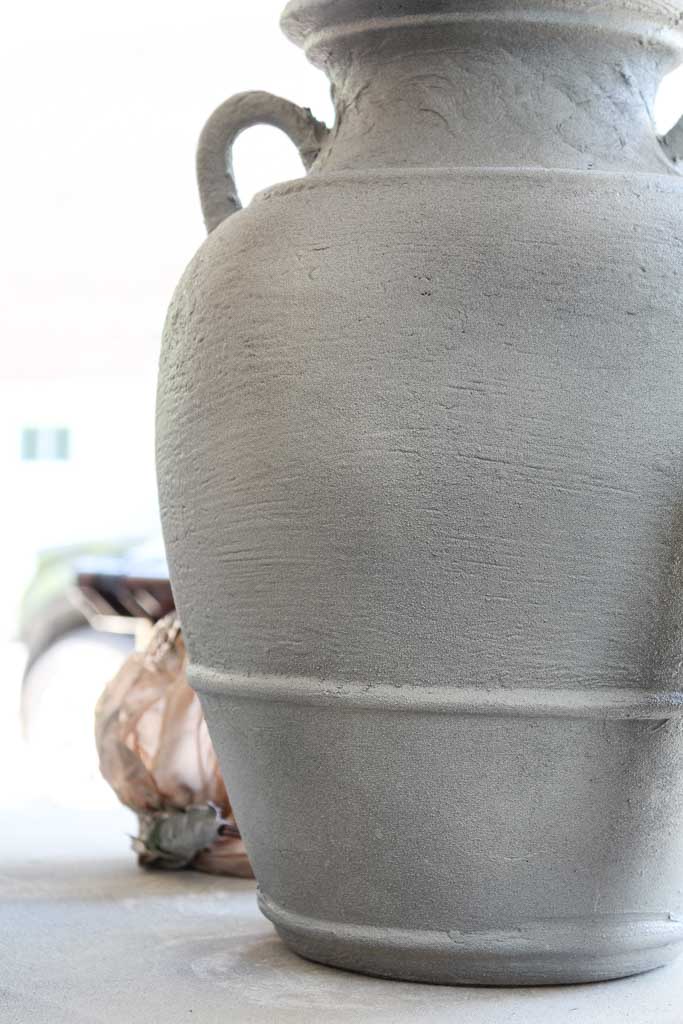
Step 5: Apply your faux cement spray paint
Just as you did with the spray primer and textured stone paint, you’ll apply your faux cement spray paint in even horizontal passes until it’s fully coated.

It added that grey cement coloring to the lamp base, but it was still in need of some variation to give it that true cement lamp look.

Step 6: Layer in additional colors
This step is really more of an art than a science. I played around with different techniques to get the right color variation and cement look. Ultimately I ended up spraying short, light bursts of flat black spray paint in no particular pattern on the lamp.
Then, I went on to cover those dark black spots with the lighter sandstone textured spray paint in the exact same manner.
Finally, I layered on some additional faux cement spray paint using the same exact technique. I think it gives the lamp the right amount of dark and light patches and gets rid of that perfectly uniform grey color.

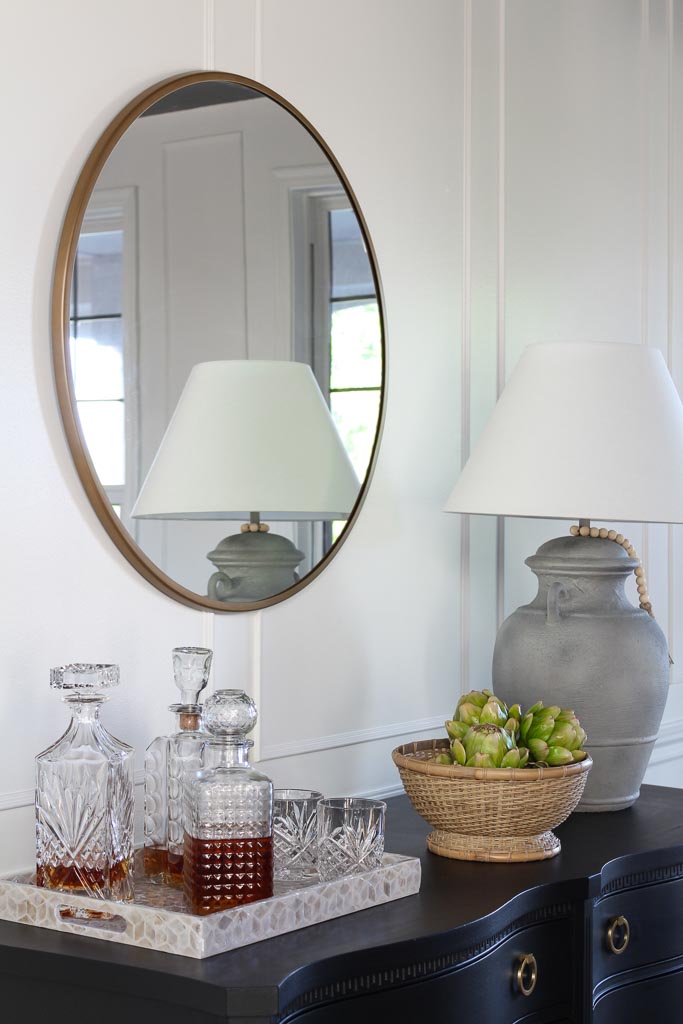
Step 7: Seal your new faux cement lamp base
Lastly, you’ll want to protect your newly finished lamp base by sealing it. I chose a matte clear spray paint sealer so that I could avoid an overly shiny finish.

What do you think?! I’m in love with this inexpensive, but high-end cement lamp look! I even added a new cone shade to it for a more modern look.
Have a question? Leave me a comment below, I love hearing from you!


